Maximizer CRM’s ability to integrate with Microsoft Outlook means you can send and save emails into your Maximizer system. This allows you to quickly and easily track email threads, create new contacts, tasks and customer service cases all from within Outlook without having to hop from one application to the other.
How to save an email to a Maximizer entry from Outlook
You can save email messages in Microsoft Outlook directly to Address Book entries, Opportunities, and Customer Service Cases in Maximizer CRM. Watch our short video to see how this is done:
Email messages are saved in the documents tab of the selected entries. You can save a single email message or multiple email messages to an Address Book entry, Opportunity, or Case.
If there are no Address Book entries, Opportunities, or Customer Service Cases associated with the email message, you can search for entries in your Maximizer Address Book to save the email message to. The email message is then saved to the selected entries as a document. Depending on your logging preferences, notes may be automatically saved to the entries as well.
If you or another user has already saved the email message to the entry, Maximizer will avoid creating a duplicate entry by not saving the email again.
1. In Outlook, select the email message or multiple email messages.
– or –
2. In Outlook, open the email message.
In the Home, Message, or Maximizer tab, expand the Save to Maximizer menu and select Save to Address Book Entry, Save to Opportunity, or Save to Case.
If the Confirm when saving email option is disabled, the email message is saved as a document to the Address Book entry that contains the email address of the sender or recipient, or the Opportunity or Case whose contact contains the email address of the sender or recipient.
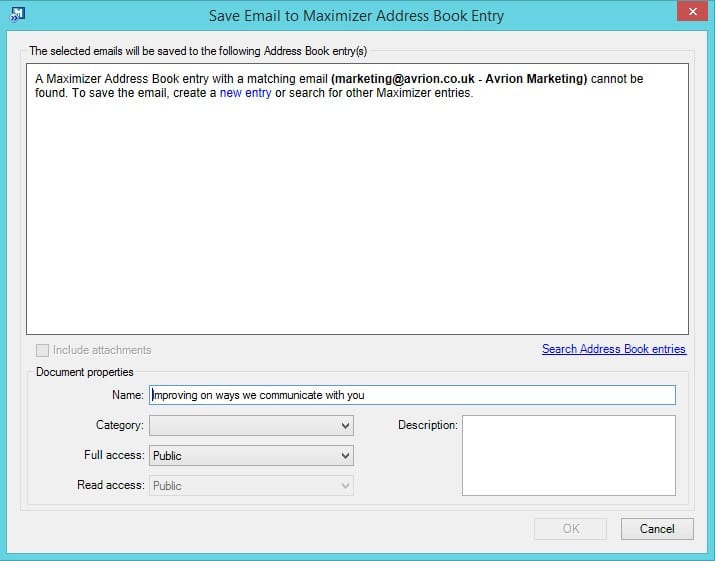
If the Confirm when saving email option is selected, the Save Email to Maximizer Address Book Entry, Save Email to Opportunity, or Save Email to Case dialogue box opens. The list displays all of the entries that contain the email address of the sender or recipient. If no such entries exist, the list is empty.
Tip: To enable or disable the Confirm when saving email option, select the Maximizer Outlook Integration Preferences icon.
3. If the entries that you want to save the email to do not appear in the list, click Search Address Book entries, Search opportunities, or Search cases. The Search Maximizer Address Book entries, Search Maximizer opportunities, or Search Maximizer cases dialogue opens.

4. Enter the Last Name or Company of the Address Book entry or Opportunity contact that you want to search for and click Search.
– or –
Select the case field to Search for and the value to Search by, and select the case Status that you want to search for and click Search.
The search results are displayed in the list.
5. Select the checkbox next to each of the entries to which you want to save the email and click OK.
- Select the checkbox in the header row to check or un-check all of the entries in the list.
- Click View selected entry in Maximizer to open your Maximizer Address Book and view the selected entry.
The selected entries are added to the list.
6. If you want to include attachments when saving the email, select the Include attachments option.
Tip: To change the default for the Include attachments option, select the Maximizer Outlook Integration Preferences icon.
7. Specify the document properties for the saved email.
- Enter a Name and Description for the document.
- From the Full access and Read access drop-down lists, select the users or groups with rights to the document.
- From the Category drop-down list, select the document category.
8. Check the box next to each of the entries that you want to save the email to and click OK. The email is saved to the documents of all selected entries.
We hope you find these Maximizer CRM tutorials useful, but do contact us if you need any help with using it:
- Tel: +44 (0)1992 661244
- Email: enquiries@avrion.co.uk
- Web form here
- Subscribe to our YouTube channel


