In our previous blogs, we covered the basic Preferences and Logging and Calendar/Hotlist Preferences. In this blog, we cover the preferences in MAXIMIZERCRM for:
- Monitoring
- Startup
- Format
Reminder: How to Access your Preferences in MAXIMIZERCRM
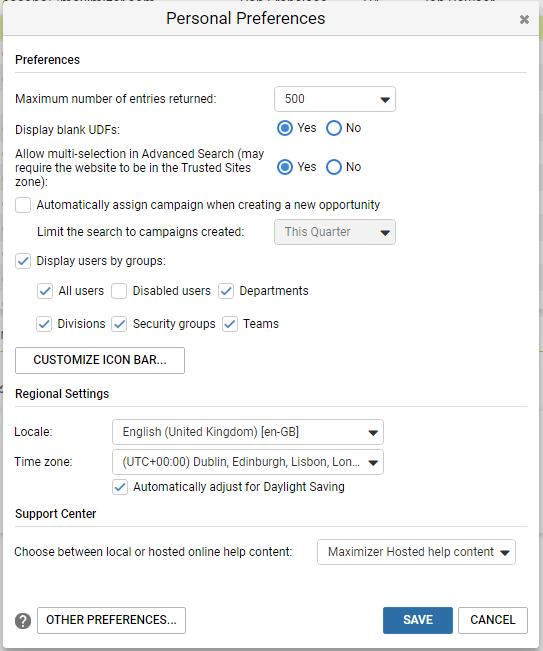
In the top-right corner of the page, click on the cog icon to access your Preferences.

The basic Preferences appear:

1. Monitoring
Monitoring preferences enable you to configure email notifications for Opportunities and Customer Service cases you are selected to monitor.
Monitoring rules for: Select which type of entry you are configuring. You can monitor Opportunities or Customer Service cases.
Receive monitoring notification on note changes: If this option is enabled, an email is sent whenever a note is added or modified.
Receive monitoring notification on field changes: If this option is enabled, an email is sent when fields are modified. You can choose whether you want to be notified when any field is changed (select All fields) or when specific fields are changed (select all the fields you want to monitor).
2. Email
Save time by setting defaults for sending emails.
Save copy of message to entry’s Documents: Automatically save the email as a document for the related Address Book entry.
Include message body in email note: A great feature to set if you want to search notes for email content as well as phone notes. This option includes the message body of the email in a note when an email is sent. Tip: You must also enable the Email notes option in your logging preferences for this feature to work.
Display warning when logged email has no Address Book entries assigned for logging: Displays a warning when you select to log an email to the Notes and/or Documents tab, but no address Book entries are assigned for logging. Saves you wondering why nothing is happening!
When sending email from Documents tab, log only to the current entry by default: Sets the default to log an email note only to the current entry when sending email from the Documents tab.
When sending email to multiple entries set the default as “Separately” (merging the recipients one at a time): It is a good idea to set this so that you don’t inadvertently publish your recipient’s email addresses to each other. Sending “separately” means that each recipient receives a separate email instead of a single email to multiple people.
Compose messages in HTML: Defaults the email editor to HTML format to ensure you can access more formatting options.
Fonts
Most organisations have a corporate style, so set your default fonts here for any email messages sent directly from MAXIMIZERCRM. You can specify different fonts for new messages and replies / forwards.
AutoSignature
Similar to Fonts, if your organisation has a standard email footer, set it up here if you send emails directly from MAXIMIZERCRM rather than Outlook / Gmail etc. Use the formatting toolbar to customise the appearance of the AutoSignature then select the following options as appropriate:
Add AutoSignature to the end of outgoing messages: Automatically appends the AutoSignature to the end of all email messages sent from MAXIMIZERCRM.
Suppress AutoSignature when forwarding and replying: Omits the AutoSignature when you forward or reply to messages.
3. Startup
When you first log into MAXIMIZERCRM, make sure it is set up so you can hit the ground running!
You can either go straight to a particular module e.g. Hotlist, or, if you don’t want to open a specific page and would rather log in to the page that was opened the last time you used MAXIMIZERCRM, select the *Last accessed module option.
My Work Day is a great overview to help you plan your daily activities:
Show Dashboards: Adds the Dashboards tab to your My Work Day.
Show Tasks and Appointments: Includes sections for Tasks and for Appointments in the My Work Day page.
Show Company Announcements: Includes Company Announcements in the My Work Day page. Tip: The documents are stored in the Company Announcements folder in the Company Library.
Startup Options
Choose the list of entries that you want to display when you first open a module.
Select a list to view at startup for: You can set startup options for Address Book, Opportunities and Customer Service. Depending on which module is selected, the settings change.
View empty list: Displays an empty list containing no entries, ready for you to start building your list.
View list from last Maximizer session: Displays the list of entries that was open when you last used MAXIMIZERCRM – a great way to pick up where you left off.
View Favorite List: Displays the entries from the selected Favorite List (a static list of records). For example, My Top 10 Customers, Currently Active Projects and so on.
View Saved Search: Runs the selected saved search from your Search Catalog and displays the results. This could be Companies where you are the Account Manager.
Ask at Address Book startup which list to view: Prompts you to choose which Address Book list you would like to view each time you log in to MAXIMIZERCRM so you can decide what you want to see as you log in.
In addition to the options above, you can choose to view Current Opportunities (everyone’s current opportunities), My Cases (cases where you are the owner) and My Current Cases (open cases where you are the owner).
4. Format
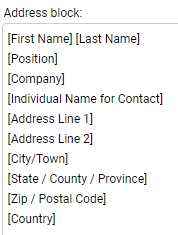
Set the address format used for the Name and Address merge field and when printing envelopes and labels using the Maximizer Word integration.
Available fields: Displays the merge fields that may be used in a custom address block.
Address block: Displays the current address block format – suggested format below.
To add a merge field to your address format, place your cursor in the Address block where you want to insert the field, then select the field in the Available fields list and click the >> button.

Restore to default: Restores the system default Address block.
Date formats: Choose how you want display dates. Short dates are best for optimising column layouts.
Further information
To learn more about how to configure your preferences in MAXIMIZERCRM and other clever ways to help you become even more effective and efficient, get in touch with us:
Tel: +44 (0)1992 661244
Email: enquiries@avrion.co.uk
Web form here
Subscribe to our YouTube channel


